GitHub
Overview
This document provides an overview of integrating the Signadot CLI with GitHub, using GitHub Actions.
Implementing this integration follows the following steps.
- Adding a sandbox specification to the repository.
- Setting up the Signadot API key configuration.
- Configuring a job to set up and test using sandboxes in GitHub Actions.
- Optionally setting up automatic deletion of sandboxes for Pull Requests.
Adding a Sandbox Specification
When a sandbox is created in a CI context, in general it needs to be tailored to run the changes represented in a pull request or commit. These customizations serve to identify the sandbox in a way that can be associated with the commit and to have the sandbox set up to run the changes in the commit.
To accomplish this, a template of the sandbox
specification, in the form of a yaml file is
stored within the git repository, by convention in
.signadot/<service-name>-template.yaml. The sandbox template below provides
a simple example that is setting up a sandbox for a single service
called my-svc.
name: "@{name}"
spec:
  cluster: "@{cluster}"
  forks:
  - forkOf:
      kind: Deployment
      namespace: default
      name: my-svc
    customizations:
      images:
      - image: "@{image}"
Setting up the Signadot API key configuration
The signadot command needs to have two parameters configured.
- Signadot Org, which is the name of your organization's account
with Signadot. In CI contexts, this is usually easiest to accomplish by
setting the environmental variable
SIGNADOT_ORGwhen running the command. - API Key, which is required to access the Signadot Control Plane. This is
also usually easiest to accommplish by setting the environment variable
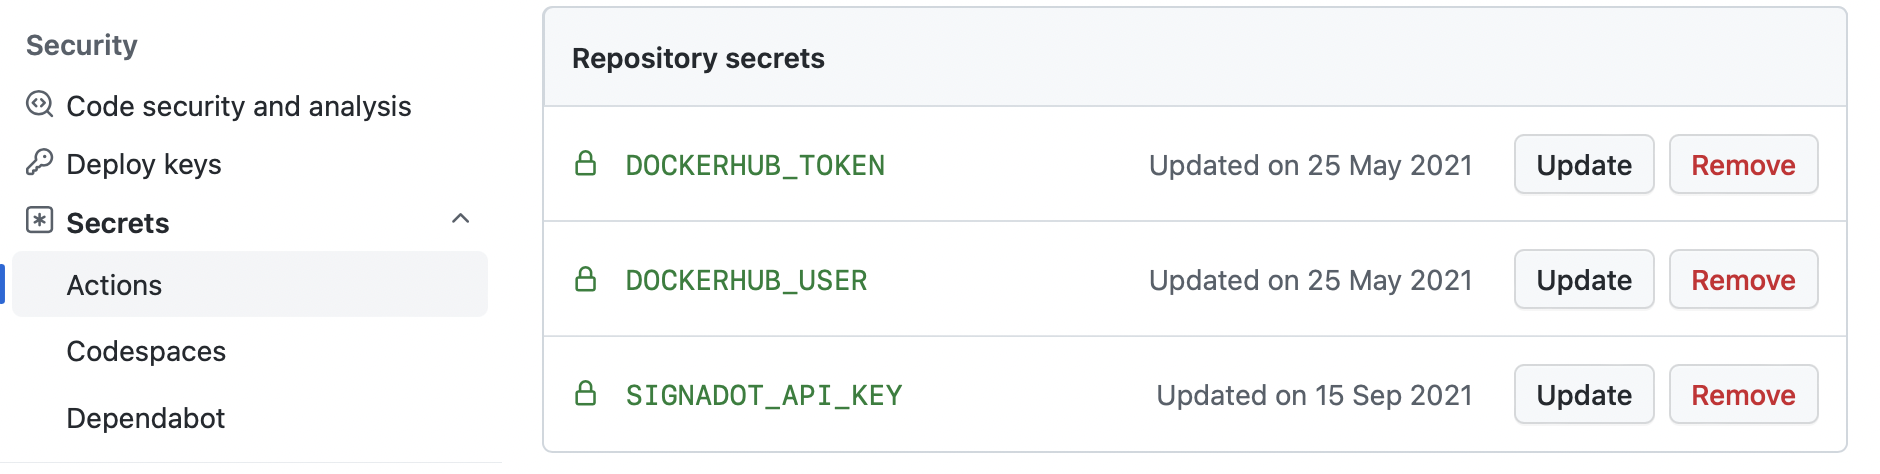
SIGNADOT_API_KEYwhen running the command, which in turn should be stored as a GitHub secret.
Both of these values are made available when a new API Key is created via the Signadot Dashboard.
To set up the github secret for a repository, you will need to create a secret
for a github action containing the signadot API key as a value. To do so,
edit secrets in the settings for the repository, as in the screenshot
below.
GitHub Action
Below shows a commented GitHub action job which runs signadot to set up a sandbox for each new
commit and run tests against it. The specification in use in the example below is along the lines of
the sandbox template specified above.
jobs:
  run-tests:
    runs-on: ubuntu-latest
    # dependency on building image for a service.
    needs: [ build, changes ]
    env:
      SIGNADOT_ORG: signadot
      SIGNADOT_API_KEY: ${{ secrets.SIGNADOT_API_KEY }}
      SIGNADOT_CLUSTER: demo
      IMAGE_TAG: ${{ github.sha }}
    steps:
      - name: Set up Signadot CLI
        run: |
          curl -sSLf https://raw.githubusercontent.com/signadot/cli/main/scripts/install.sh | sh

      - name: Create Sandbox
        run: |
          # Define the sandbox name using a short version of the gitsha to respect the
          # limit (30 chars)
          export SANDBOX_NAME="my-svc-${IMAGE_TAG:0:6}"
          echo "SANDBOX_NAME=${SANDBOX_NAME}" >> "$GITHUB_ENV"

          # Create the sandbox
          echo "Creating sandbox ${SANDBOX_NAME}..."
          signadot sandbox apply \
            --set name=${SANDBOX_NAME} \
            --set image=docker-user/repo:${IMAGE_TAG} \
            --set cluster=${SIGNADOT_CLUSTER} \
            -f - \
            < ${GITHUB_WORKSPACE}/.signadot/my-svc-template.yaml

      - name: Test Sandbox
        run: |
          # Run the proxy. In this example we will map the in-cluster
          # http://my-svc.default.svc:8080 to http://localhost:8080 (the proxy will take
          # care of performing the routing key injection)
          #
          echo "Starting signadot proxy..."
          signadot local proxy --sandbox ${SANDBOX_NAME} \
            --map http://my-svc.default.svc:8080@localhost:8080 > /tmp/signadot-proxy.log &
          PROXY_PID=$!
          sleep 1
          cat /tmp/signadot-proxy.log

          # Run integration test scripts here. In this example, we use curl
          # as a minimal placeholder that will run on most systems.
          #
          curl --fail localhost:8080

          # Stop the proxy
          echo "Stopping signadot proxy..."
          cat /tmp/signadot-proxy.log
          kill ${PROXY_PID}

      - name: Delete Sandbox
        run: |
          echo "Deleting sandbox..."
          signadot sandbox delete ${SANDBOX_NAME}
You can find a real-life example of using sandboxes within GitHub Actions in our HOT R.O.D repository.
Set up Automatic Deletion of Sandboxes
In the previous GHA workflow example, we are deleting the Sandbox inline with
the execution of the run-tests job, which is fine if you are only running
automated tests, but if you are also using Signadot to perform previews, you
will want to keep the sandbox alive until the PR is merged or closed.
GitHub Pull Request Integration can be used to tie a Sandbox to the lifecycle of a GitHub Pull Request. The Sandbox is automatically deleted when the Pull Request is closed.
To set up the integration with GitHub, you will need to initiate the integration workflow through the Signadot Dashboard under Settings > Integrations. This will guide you to install the Signadot GitHub application into your GitHub organization.
Once the integration has been set up, it can then be used in the sandboxes you create using Sandbox Labels.
Specification
Two special label keys can be used to specify the association with a GitHub pull request. These labels are:
| Label Key | Value | Example |
|---|---|---|
signadot/github-repo | path of github repository (org/repo) | signadot/community |
signadot/github-pull-request | pull request number | "123" |
Example
To make use of this integration, typically you will want to add the above
template variables to the sandbox specification stored under .signadot in your
repository. An example specification is written as shown below:
name: pr-xyz-@{github-pr}
spec:
  cluster: signadot-staging
  description: sandbox for @{github-pr}
  labels:
    signadot/github-repo: "github-org/github-repo"
    signadot/github-pull-request: "@{github-pr}"
  forks:
  - forkOf:
      kind: Deployment
      namespace: workspaces
      name: web
    customizations:
      images:
        - image: "myrepo/image:@{tag}"
  defaultRouteGroup:
    # ...
You may also invoke the same integration through the Signadot API by passing the same label parameters shown above.